The importance of adding captions to YouTube videos
Knowing how to add captions to YouTube videos is no longer an optional skill for content creators; it is an absolute necessity. Adding accurate text to your content significantly boosts accessibility, viewer retention, and search engine optimization (SEO).
According to data from the World Health Organization (WHO), over 1.5 billion people globally live with hearing loss, making captions vital for inclusive broadcasting. Furthermore, a comprehensive study by Verizon Media revealed that 69% of consumers watch videos with the sound off while in public spaces.
If your videos lack captions, you are alienating a massive segment of your potential audience. Captions guarantee your message is communicated clearly, regardless of the viewer's environment or hearing ability.
By consistently integrating this crucial step into your regular upload process, you can dramatically increase your overall watch time, improve community engagement rates, and ultimately accelerate your YouTube channel's growth.
Captions vs. subtitles: know the differences
While they are frequently used interchangeably in casual conversation, captions and subtitles serve entirely distinct purposes in the professional realm of video content. Thoroughly understanding this nuanced difference is absolutely crucial when deciding how to best enhance your YouTube videos for your target demographic.
| Subtitles | Captions |
| Purpose: Subtitles are primarily designed for viewers who can hear the audio perfectly well but do not comprehend the specific language being spoken.Content: They seamlessly translate spoken dialogue into the viewer's native language.Context: Subtitles safely assume the viewer can clearly hear background noises, musical cues, and emotional tonal shifts, so they generally exclude these auditory elements. | Purpose: Captions are created specifically for viewers who are deaf or hard of hearing, or those simply watching their devices on mute.Content: They provide a complete, comprehensive text-based transcription of the entire audio track.Context: Beyond just capturing spoken dialogue, true closed captions include vivid descriptions of crucial non-speech audio elements. This means transcribing sound effects (e.g., [door slamming]), identifying off-screen speakers, and actively noting musical cues (e.g., [eerie music playing]). |
YouTube fully supports both formats, but when successful creators talk about maximizing overall accessibility and user retention, they mean captioning.
How do you add captions to YouTube videos?
There are several ways to tackle accessibility on your channel. Below are the four primary methods for adding text to your videos.
Method 1: How to add captions to videos on YouTube using Framia Pro?
Framia Pro is an elite, all-in-one AI video/image generation and editing platform designed specifically to eliminate the tediousness of manual transcription. Featuring lightning-fast artificial intelligence and highly accurate speech recognition capabilities, Framia Pro analyzes your audio and generates perfectly timed, beautifully styled text in mere seconds. It brilliantly bridges the gap between raw video and polished, highly accessible content, offering customizable fonts and seamless exporting options that standard browser platforms lack.
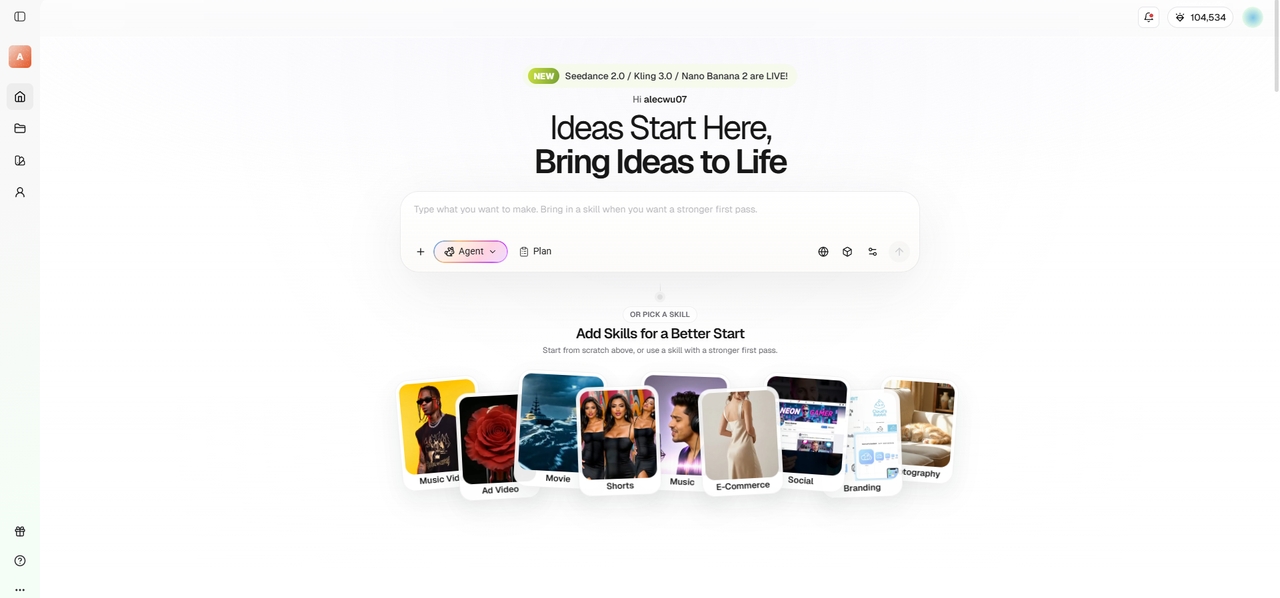
Simple steps to add captions to a YouTube video on Framia Pro
To start using Framia Pro to add captions to your YouTube video, be sure to follow the recommended steps below judiciously.
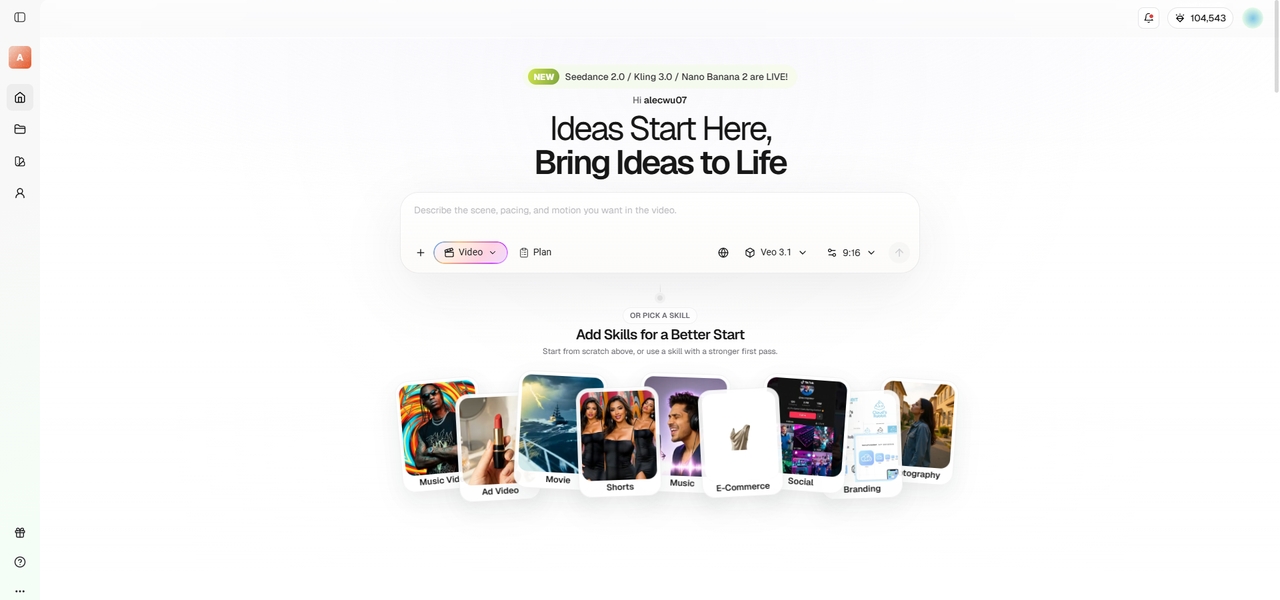
Step 1: Select your Framia agent and choose your AI video model
First, select the Framia "Video" agent from the drop-down menu and then choose your preferred AI video generation model. Additionally, choose the aspect ratio that your video is in (16:9 for long-form YouTube content and 9:16 for short-form content).
Step 2: Upload your video and provide your prompt
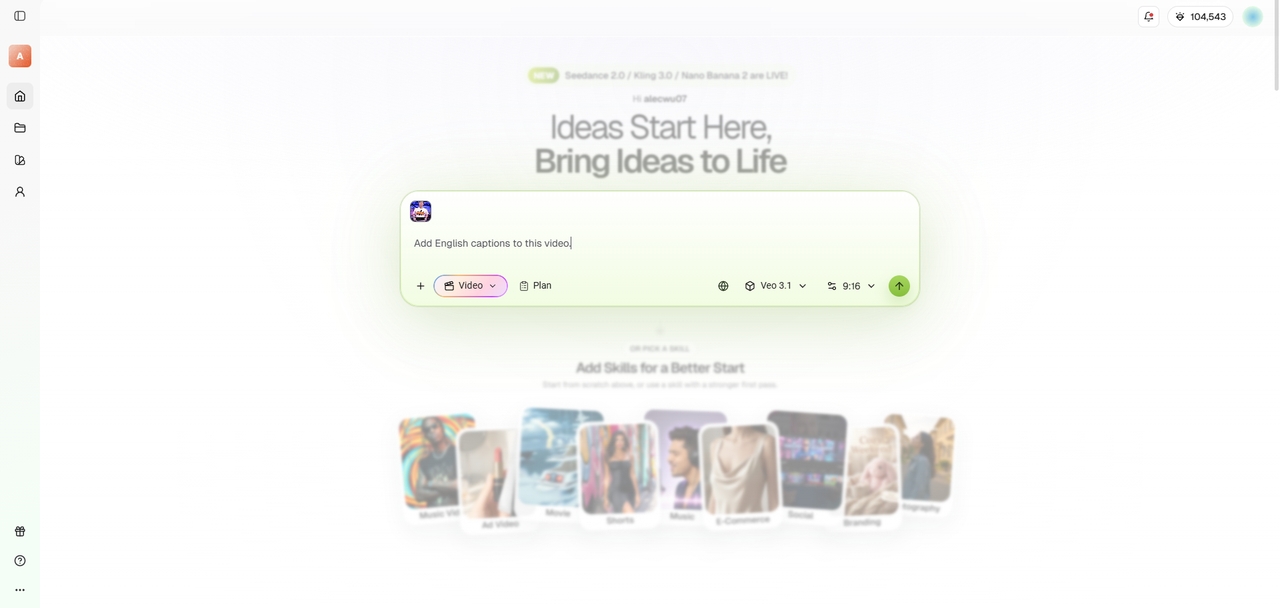
After that, proceed to upload your video, to which you want to add captions, and then provide a prompt for the same.
Step 3: Finalize and export your captioned video for YouTube
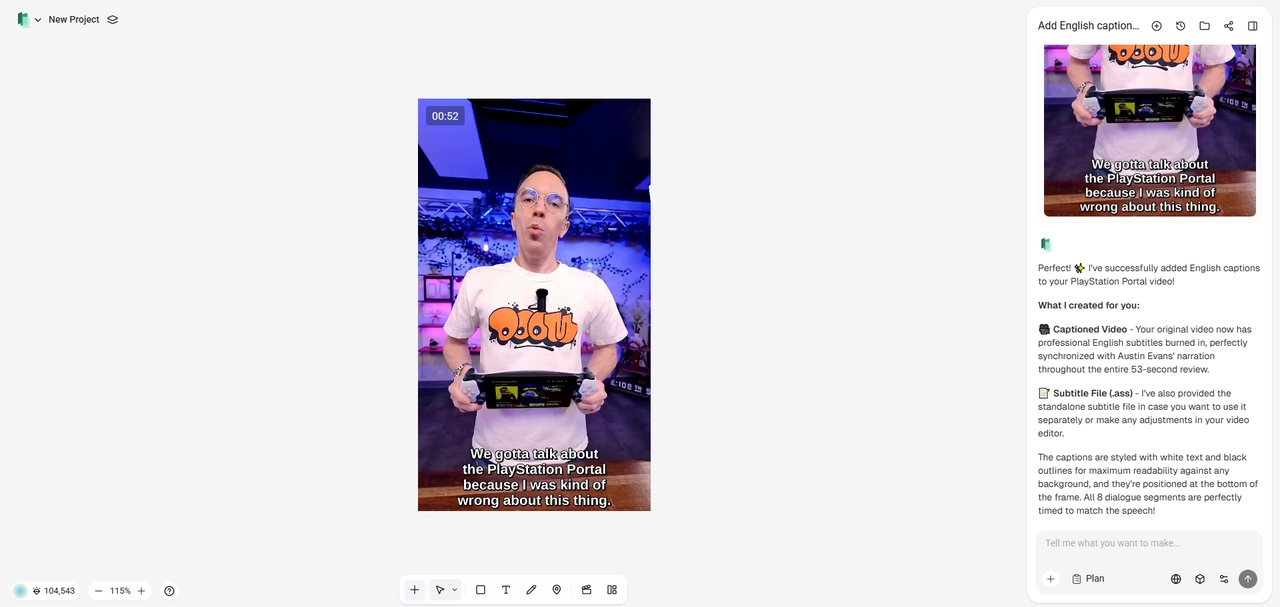
Framia Pro will start analysing the audio contents of your video and will then automatically create and embed captions to your video. Once completed, you can decide to further edit the video via Framia Pro's "Storyboard" or download it to upload to YouTube.
Method 2: Upload a caption file
Learning how to add captions to viral YouTube videos using a pre-written file is the most professional and highly accurate method available to creators.
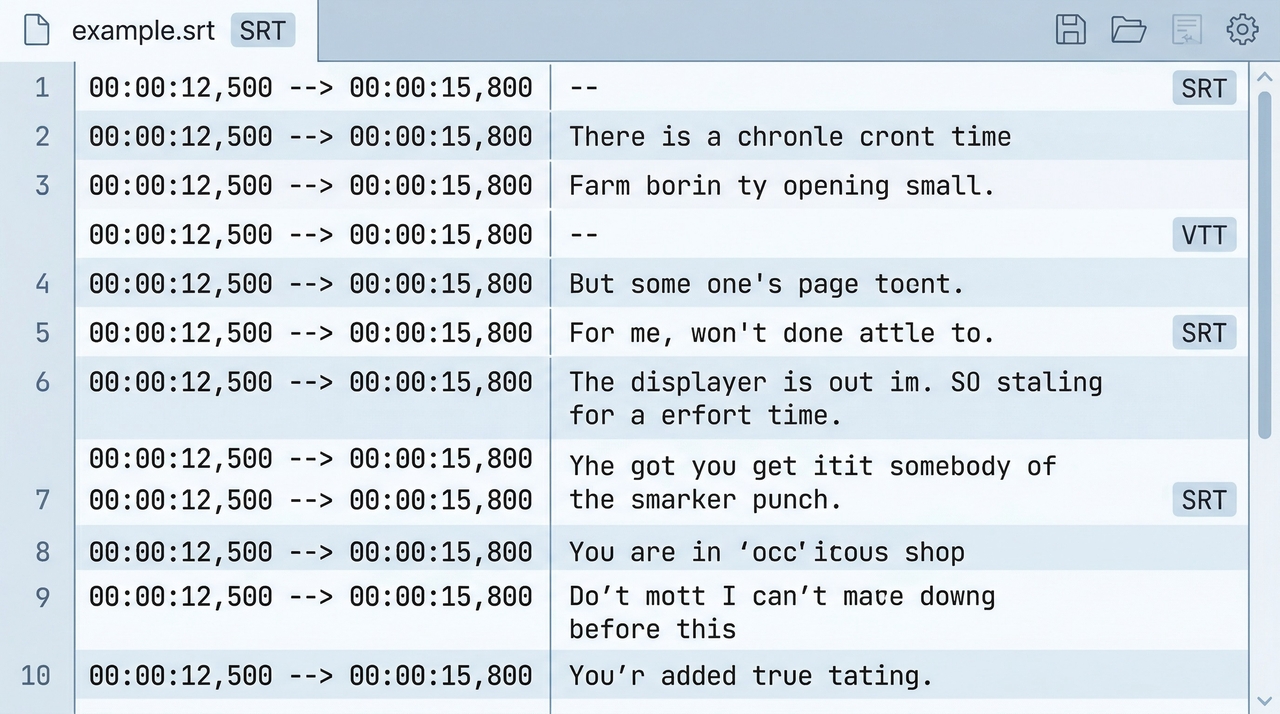
This approach involves creating or purchasing a transcript file, most commonly in SubRip (.srt) or WebVTT (.vtt) format, that contains both the spoken text and the specific timecodes dictating exactly when each line should appear on the screen. Because you are working offline or utilizing a dedicated transcription service, the accuracy rate is remarkably high, saving you from embarrassing auto-generation errors.
Step 1: Access the "Subtitles" menu
To begin this process, log into your YouTube Studio dashboard. From the left-hand navigation menu, navigate directly to the "Subtitles" section and select the video you wish to edit. Click on "Add Language" if necessary, and then select "Add" under the subtitles column.
Step 2: Upload your file
Choose the "Upload file" option from the menu. YouTube will then ask if your file contains timing data. If you have a standard .srt file, select "With timing" and click "Continue" to select the desired transcript file from your computer's hard drive.
Step 3: Review and publish
Once successfully uploaded, YouTube automatically parses the file and populates the text boxes on the left side alongside a visual timeline on the right. This is an excellent opportunity to carefully review the timing. Even with a pre-timed file, you might want to make micro-adjustments by dragging the edges of the caption blocks on the timeline to ensure they sync perfectly with the audio waveform. After reviewing the text for formatting or spelling, simply click "Publish."
Method 3: Type captions manually
If your uploaded video is relatively short, or if you simply prefer a hands-on approach without relying on any external software or premium services, typing your captions manually directly within the platform is a highly effective solution.
This native YouTube feature gives you ultimate granular control over exactly what appears on screen and precisely when it appears, making it absolutely perfect for vloggers producing snappy, fast-paced content.
Step 1: Open the manual editor
To get started with this technique, access YouTube Studio and safely navigate to the "Subtitles" menu on the left toolbar. Click on the video you are working on, choose "Add," and then select the "Type manually" option from the dropdown. This will open YouTube’s comprehensive built-in caption editor.
Step 2: Transcribe the audio
You will see a text box on the top left where you can immediately begin typing. The most efficient way to utilize this tool is to play the video using the spacebar, listen intently to a few seconds of audio, pause, and type out exactly what you just heard. Make sure to check the "Pause while typing" toggle, which stops the video automatically the exact moment you hit a keyboard key.
Step 3: Synchronize and publish
As you type, YouTube intuitively creates caption blocks on the timeline situated below. Once you have completely typed a segment, you will need to manually adjust the timing. You can effortlessly do this by dragging the caption blocks on the timeline to align visually with the audio waveforms. After transcribing and synchronizing the entirety of the video, click the "Publish" button.
Method 4: Use YouTube's auto captioning mechanism
For content creators who are short on time and desperately need a fast solution, relying on YouTube’s built-in Automatic Speech Recognition (ASR) technology is by far the most convenient route.
When you upload a new video, whether long-form or YouTube Shorts, YouTube utilizes sophisticated algorithms to automatically generate captions in the background. However, it is vitally important to understand that auto-captions are notoriously prone to blatant errors, lack proper punctuation, and struggle with complex jargon, so they require manual editing before they are ready for viewers.
Step 1: Duplicate the auto-captions
To edit them properly, go to YouTube Studio, click "Subtitles," and diligently look for the "Published - Automatic" file sitting next to your video. Click "Duplicate and Edit." This action overrides the automatic file and opens a user-friendly editing interface where you can clearly see the machine-generated text.
Step 2: Edit and correct text
Because the initial text lacks proper formatting, you must carefully play through your YouTube video and actively correct misspelled words, fix broken grammar, and insert necessary punctuation like commas, periods, and question marks. This step acts as a bridge between artificial intelligence and high-quality human polish.
Step 3: Adjust timing and publish
In addition to textual corrections, you can also tweak the timeline if the algorithm placed text on the screen slightly too early or late. Just drag the edges of the text blocks on the bottom timeline to match the audio properly. Once you have cleaned up the transcript to a high professional standard, click "Publish."
Tips & tricks when adding captions to YouTube videos
Creating captions isn't just about randomly throwing words on a screen; it requires thoughtful strategy. Follow these five essential best practices to ensure your captions are highly effective and engaging.
- Prioritize accuracy: Always double-check your spelling and grammar before publishing. Poorly written text looks incredibly unprofessional and can easily confuse your audience. Ensure proper nouns, brand names, and complex technical terms are spelled correctly to maintain your channel’s strict authority.
- Ensure readability: Keep text concise to deliberately avoid overwhelming the viewer. Aim for a strict maximum of two lines of text on the screen at any given time, keeping each line under forty characters. This ensures viewers can comfortably read.
- Synchronize perfectly: Timing is absolutely critical to success. Text must appear at the exact moment a word is spoken, and disappear when the speaker naturally stops. Poorly synced text causes visual dissonance. Always preview your work to ensure perfect audio-visual alignment.
- Include non-speech audio: Remember that true accessibility ultimately means conveying the entire auditory experience. Always use brackets to describe crucial non-verbal sounds, such as [audience laughing] or [upbeat music playing]. This provides absolutely vital emotional context for deaf and hard-of-hearing audience members.
- Contrast and positioning: Ensure your text remains highly visible against the shifting video background. Use a dark background box or apply a strong drop shadow behind bright text. Additionally, position the captions centrally at the bottom, ensuring they never block visual elements.
Wrapping up
Understanding exactly how to add captions to YouTube videos is a transformative skill that dramatically elevates your content's overall quality, heavily boosts SEO rankings, and guarantees maximum accessibility for a diverse global audience.
Whether you carefully choose to upload a dedicated transcript file, patiently type out the dialogue manually, or refine YouTube’s automatic speech recognition, taking the time to caption your work is always a worthwhile investment.
However, to save countless hours while consistently achieving flawless, stylized results, utilizing a premium AI-driven tool like Framia Pro remains undeniably the best, most efficient solution for serious modern creators.
FAQs
Do YouTube auto-captions support multiple languages?
Yes, YouTube's auto-captioning supports multiple major languages. However, accuracy varies greatly. For flawless multilingual transcription, using advanced AI software like Framia Pro ensures perfectly translated text before publishing your video.
Can I change the font size of my captions?
As a creator, you cannot force a specific font size. However, individual viewers can easily customize the font size, color, and background style within their personal YouTube video player settings.
Does adding closed captions improve YouTube SEO?
Absolutely. Search engines crawl text rather than audio. Adding highly accurate captions generated by Framia Pro provides YouTube with keyword-rich transcripts, significantly boosting your search visibility and overall discoverability online.
What is the best file format for uploading captions?
The SubRip (.srt) format is widely considered the best overall choice for creating video captions. It is universally supported, plain-text based, and incredibly easy to create or edit using standard, basic text editing software.
How long does it take for auto-captions to appear?
YouTube's auto-captions can take hours depending on server traffic. Conversely, Framia Pro utilizes lightning-fast AI to generate perfectly timed captions in mere seconds, completely bypassing platform delays for immediate results.