
Master the art of video editing with our ultimate guide on how to add music to iMovie. Whether you are using a Mac desktop or an iPhone, this step-by-step tutorial will help you sync the perfect soundtrack. Additionally, learn how to create and edit professional cinematic videos effortlessly with Framia Pro.
Why is adding music to your iMovie project so important?

Video editing is only half of the storytelling equation; the other half is audio. Have you ever watched a cinematic vlog or a dramatic film scene with the sound muted? It feels empty. Learning how to insert music on iMovie is a foundational skill that fundamentally changes how your audience perceives and consumes your video content.
A well-chosen background track instantly sets the emotional tone of your footage. It dictates the pacing, keeping your viewers highly engaged from the very first second to the final fade-out. Furthermore, high-quality audio masks distracting background noises captured during filming, instantly boosting the professionalism of your final export. Whether you are cutting together a family vacation montage, a corporate presentation, or a YouTube vlog, understanding how to add a song to iMovie bridges the gap between amateur clips and a polished visual story.
How to add music to iMovie on Mac?
When figuring out how to add music to iMovie on a desktop computer, you will find that Apple has made the process incredibly intuitive. The Mac version of iMovie offers a spacious timeline, giving you precise control over your audio waveforms. Here is the exact step-by-step method to get your music onto the timeline.
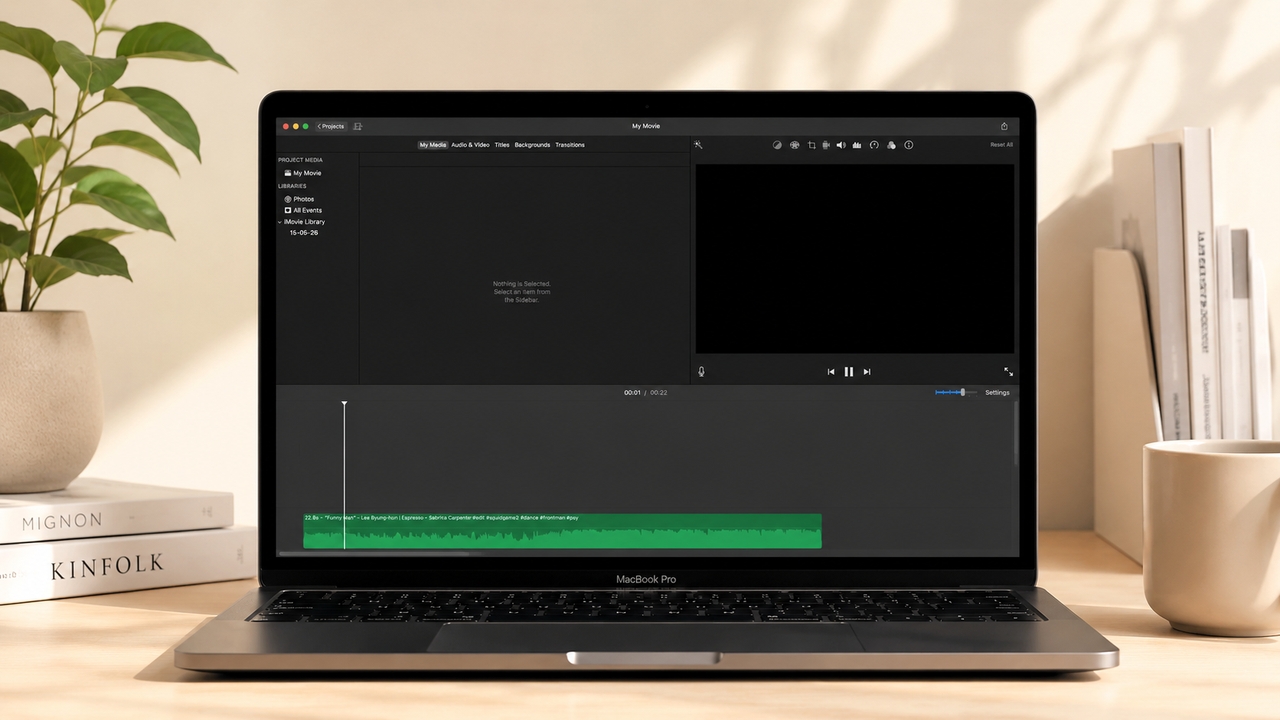
Step 1: Open your iMovie project
Launch the iMovie application on your Mac. Double-click on your existing project to open the timeline, or click "Create New" to start a fresh video project. Ensure your video clips are already dragged onto the primary timeline.
Step 2: Access the audio tab
Look at the top browser menu above your media library. Click on the "Audio" tab. This section connects directly to your built-in Apple Music library (formerly iTunes), Sound Effects, and GarageBand exports.
Step 3: Browse and select your track
Use the left sidebar to navigate through your "Music" app playlists or the built-in iMovie "Sound Effects" folder. You can use the search bar to find a specific song title. Click the play button next to any track to preview the audio before committing to it.
Step 4: Drag and drop to the timeline
Once you have found the perfect track, simply click and hold the song file. Drag it down toward your project timeline. To use the song as background music that plays independently of your video clips, drag it to the background music well (the area located at the very bottom of the timeline).
Step 5: Pin audio to specific clips
If you want the music to start precisely when a specific video clip begins, drag the audio file directly underneath that specific video clip until you see a small connecting line. This "pins" the audio, meaning if you move the video clip later, the audio will move right along with it.
How to edit and adjust your music in iMovie (Mac)
Simply dropping a track onto the timeline is rarely enough. To make your video flow beautifully, you need to adjust the audio properties.
Trim the music length: Hover your mouse cursor over the beginning or end of the green audio clip on your timeline. Your cursor will turn into an adjustment tool (two arrows). Click and drag the edge inward to shorten the song so it perfectly matches the length of your video.
Adjust the volume: Notice the horizontal line running through the middle of your green audio clip. Click and drag this line up to increase the volume, or drag it down to make the music softer. This is crucial for ensuring the music doesn't overpower spoken dialogue in your video.
Add audio fades: To prevent jarring audio cuts, you should fade your music in and out. Hover over the audio clip to reveal small circular fade handles at the top left and right corners. Drag these circles inward to create a smooth, professional volume fade.
How to add music to iMovie on iPhone and iPad?
Mobile editing allows you to create stunning content on the go. If you are wondering how to add music to iMovie on iPhone or iPad, the mobile app provides a slightly different, touch-optimized workflow. Apple includes a generous library of royalty-free soundtracks right inside the app.
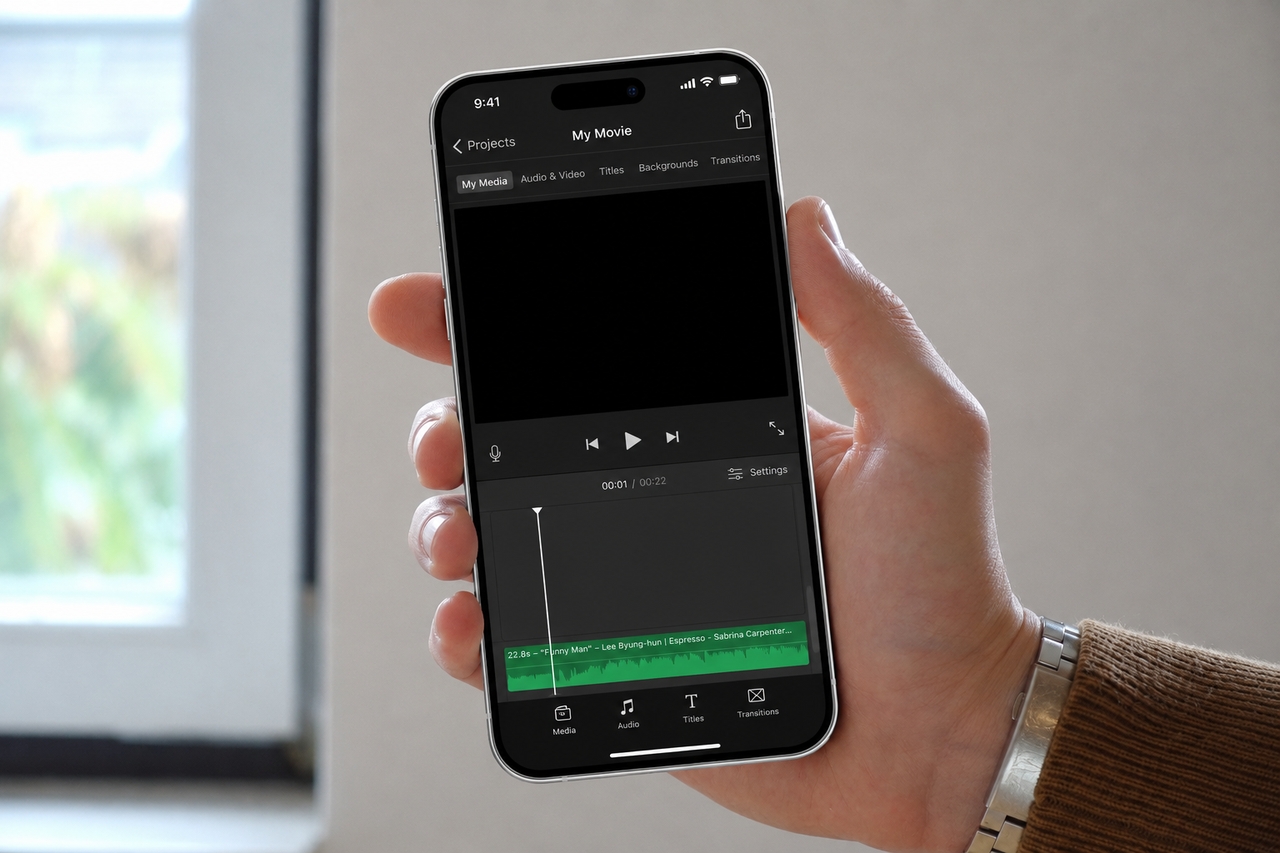
Step 1: Open the iMovie app
Launch iMovie on your iOS device and tap on your current project to open the editing timeline. Tap the "Edit" button if you are viewing the project summary screen.
Step 2: Tap the Add Media button
Scroll your timeline so the vertical white playhead is positioned exactly where you want the music to begin. Tap the "+" (Add Media) button located on the left side of the screen, just beneath the video preview window.
Step 3: Select the Audio category
From the media menu that pops up, tap on "Audio." This will open the iOS audio browser.
Step 4: Choose your music source
You will see three main options: "Soundtracks" (iMovie's built-in royalty-free music), "My Music" (songs downloaded to your device via the Apple Music app), and "Sound Effects" (short audio stings and ambient noises).
Step 5: Preview and add the song
Tap on a category, such as Soundtracks, and browse the list. Tap any song once to preview it. If it fits the vibe of your video, tap the small "+" icon next to the song title. The music will instantly be added to your timeline as a green audio bar beneath your video clips.
How to add your own downloaded files or custom music
Sometimes, the built-in sound effects or your Apple Music library just don't have what you need. If you have downloaded royalty-free music from the web or have custom voiceovers, here is how to add songs to iMovie from external folders.
On Mac: Instead of using the Audio tab, simply open your Mac's "Finder" window. Locate your downloaded MP3, WAV, or M4A file. Click and drag the audio file directly from Finder into the iMovie timeline.
On iPhone/iPad: If you saved an audio file from Safari or an email, it is likely stored in your iOS "Files" app. In iMovie, tap the "+" button, but instead of tapping "Audio," scroll down and tap "Files." Navigate through your iCloud Drive or local device folders, find your downloaded track, and tap it to instantly import it to your timeline.
How to create professional cinematic videos seamlessly with Framia Pro
While knowing how to add music to iMovie is a great foundational skill, manual editing timelines can be tedious, especially when you are trying to perfectly sync beats to fast-paced video cuts. What if you could entirely automate the video production and audio-syncing process?
Producing highly engaging, cinematic video content is now effortless with Framia Pro, a powerful generative AI creative platform. By conversing with specialized intelligent AI agents, you can generate, edit, and design stunning, professional-quality videos with perfectly synced music and native audio—without needing complex timeline editing skills.
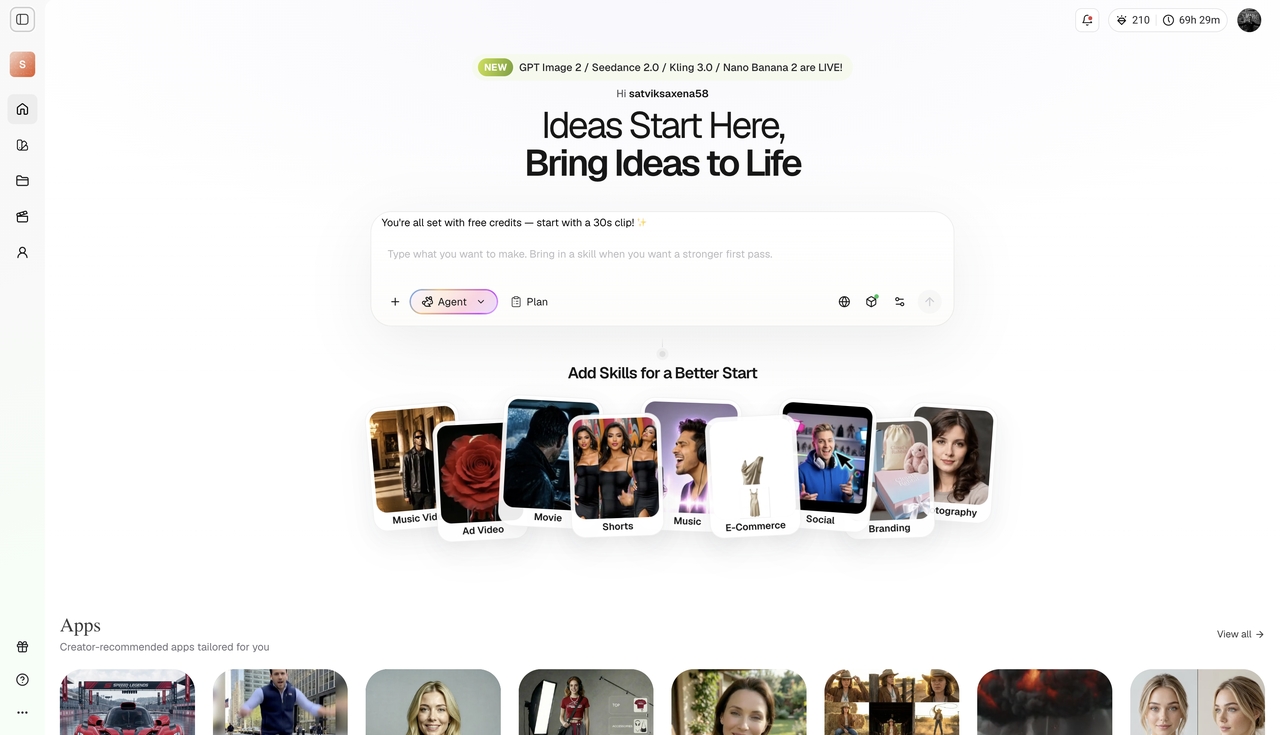
Key features of Framia Pro:
Advanced audio integration: Say goodbye to manually searching for tracks. Framia Pro utilizes advanced models like Seedance 2.0 to generate original, dual-channel background tracks and professional 48kHz native dialogue that perfectly match your video's emotional tone.
Specialized video agents: Instantly produce highly engaging content using purpose-built AI agents. Use the Shorts Agent for vertical social media clips with auto-captions and viral pacing, or the Music Video Agent to choreograph high-energy visuals perfectly synchronized to a beat.
Conversational timeline editing: Replace complex, manual iMovie trimming with intuitive text prompts. Use Framia's chat-to-edit interface to refine your video—simply type natural language commands to trim clips, swap specific camera angles, or change the background music style entirely.
Industry-leading motion models: Framia Pro natively integrates top-tier generative engines like Veo 3.1 and Kling 3.0. This guarantees broadcast-grade cinematic realism, industry-leading motion physics, and flawless lip-syncing across multiple languages.
Split-layer design control: Elevate your post-production by transforming flat AI designs into fully editable layers, allowing you to seamlessly adjust text, shapes, and graphic overlays right on top of your video.
How to use Framia Pro for seamless video creation:
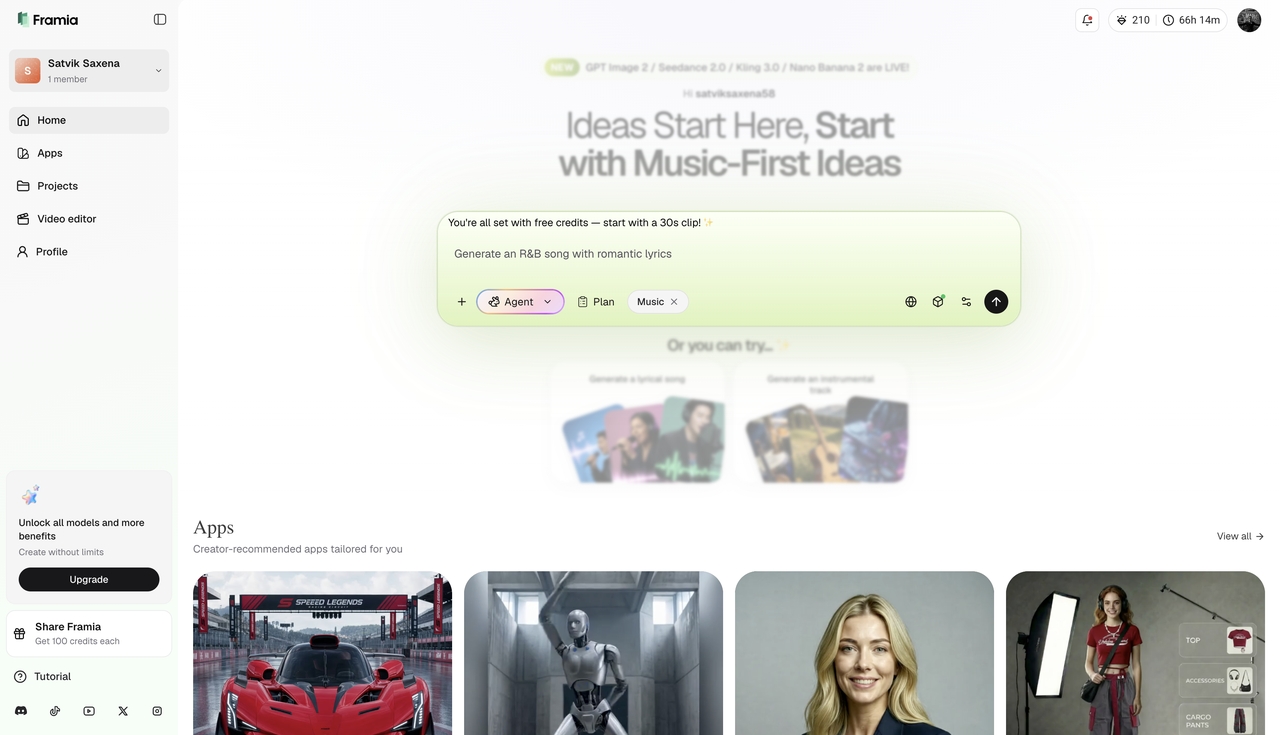
Step 1: Select your specialized Framia AI agent
Begin your creative process by choosing a dedicated Framia AI agent that fits your project. Select the "Music" agent for perfect soundtrack synchronization. This agent handles everything from custom audio generation to precise beat-syncing.
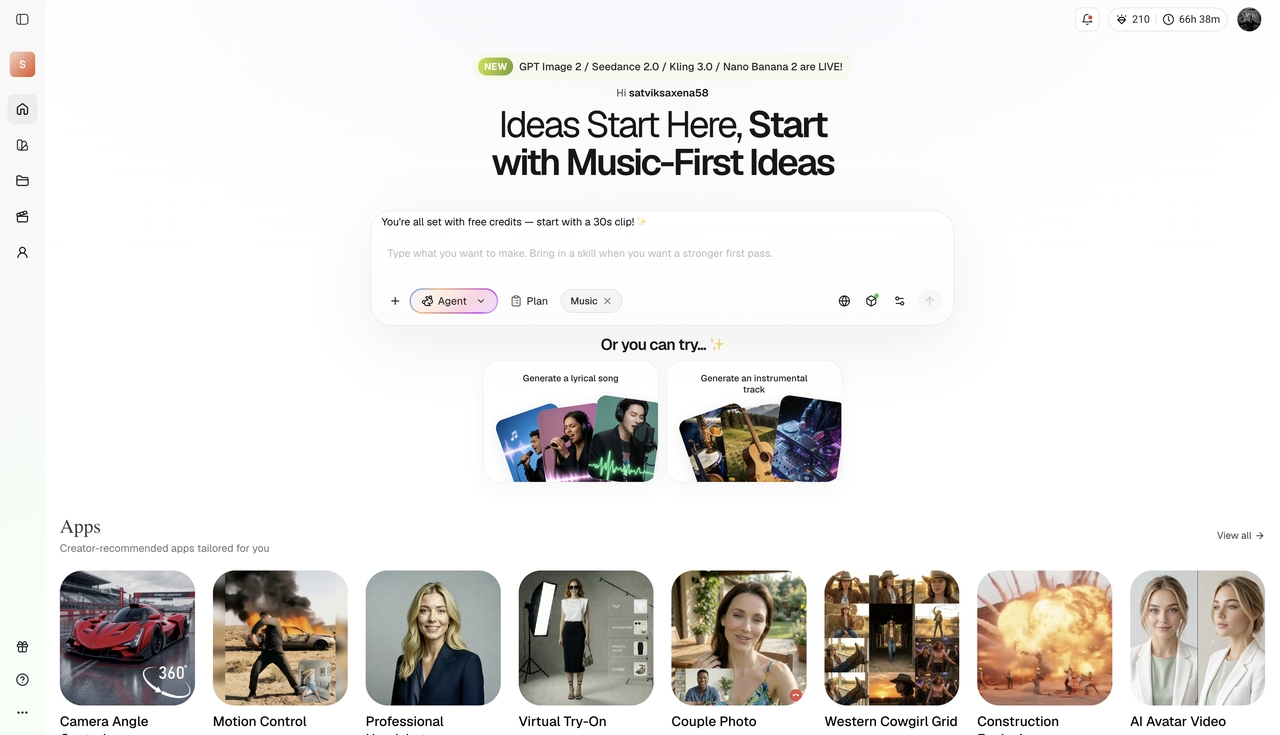
Step 2: Provide your prompt and select your model
Type a clear, descriptive prompt outlining your video's core concept, desired aesthetic, and the mood of the music you want. Select a powerful generation model like Veo 3.1 for cinematic realism or Kling 3.0 for superior character consistency and motion control.
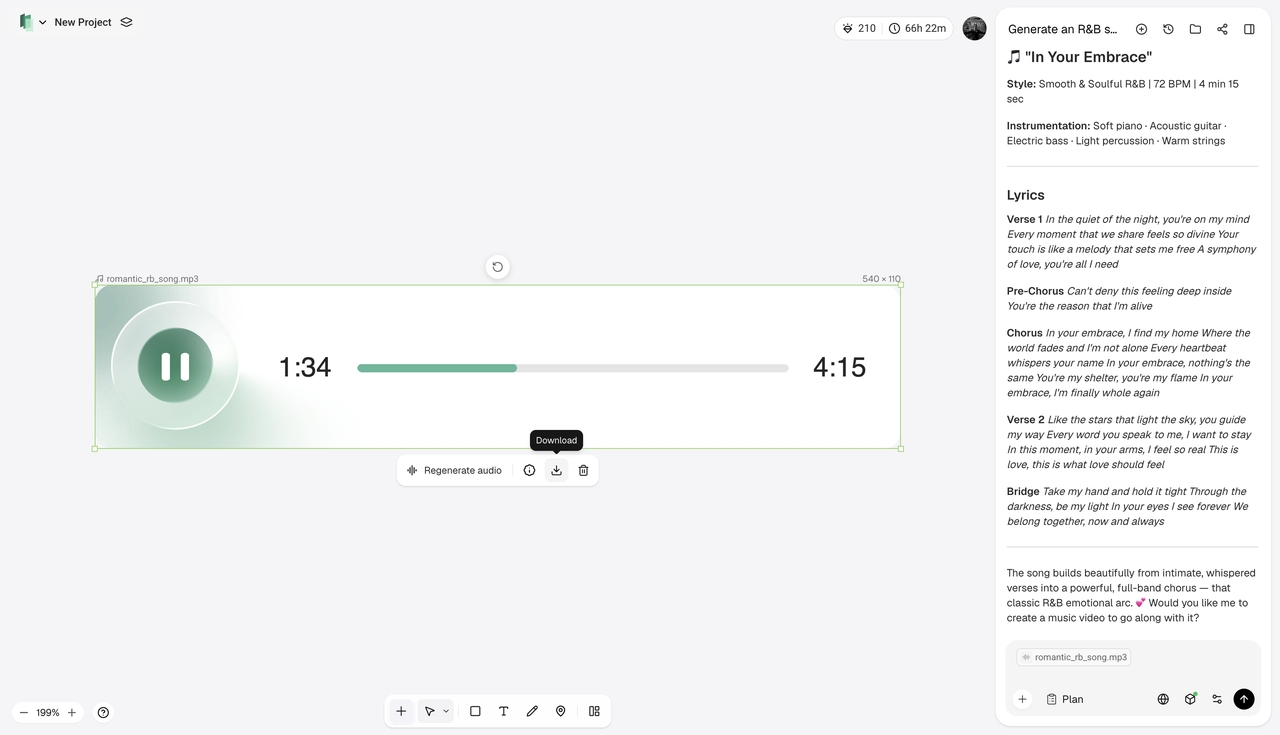
Step 3: Refine and export your cinematic video
The AI will automatically generate your storyboard, compose the main shots, and sync the audio perfectly. Review the timeline and use the chat-to-edit feature to make targeted tweaks to the music. Once you are satisfied, securely export your completed masterpiece in a high-fidelity format, ready for immediate upload.
Common iMovie audio issues (And how to fix them)
Even the best editors run into roadblocks. If you are struggling to add music on iMovie, check these common troubleshooting tips.
Songs are greyed out (DRM Protection): If you navigate to "My Music" and the songs are greyed out or give an error when you try to import them, they are likely protected by Digital Rights Management (DRM). Apple Music subscription tracks cannot be used in iMovie due to copyright laws. You must use royalty-free music, iMovie Soundtracks, or songs you have explicitly purchased and downloaded via iTunes.
Incompatible file formats: iMovie is picky about file types. If your audio file won't drag onto the timeline, ensure it is formatted as an MP3, WAV, M4A, AIFF, or AAC. Avoid using obscure formats like FLAC or OGG.
Audio is out of sync: If your music isn't lining up with your visual cuts, make sure you aren't accidentally moving the audio clip when adjusting video clips above it. Use the "Pin" feature (by dragging the audio directly under a specific frame) to lock the beat drop to a specific visual moment.
Wrapping up
Learning how to add music to iMovie is a vital step in taking your video content to the next level. A perfectly timed background track has the power to transform a collection of silent clips into a compelling, emotional story.
Whether you are precisely trimming waveforms on your Mac or quickly dropping a built-in soundtrack onto your iPhone timeline, the process is highly accessible for creators of all skill levels. Remember to utilize audio fades, balance your volume levels, and stick to royalty-free tracks to avoid copyright issues.
Furthermore, as video production evolves, platforms like Framia Pro offer incredible opportunities to bypass manual timeline editing entirely. By leveraging generative AI models and specialized agents, you can effortlessly create stunning cinematic videos with perfectly synced audio in just a few clicks.
FAQs
How do I add music to iMovie?
On a Mac, simply click the "Audio" tab above your browser to select a track, or drag an MP3 file directly from your Finder into the timeline. On iOS, tap the "+" button, select "Audio," and choose your desired song.
How do you add music to iMovie from Apple Music?
You can access your downloaded Apple Music library directly inside iMovie by selecting the "Audio" tab on Mac or "My Music" on iOS. However, DRM-protected subscription tracks cannot be used; you must own the track.
How to add music to iMovie iPhone without iTunes?
If you don't use iTunes, you can save royalty-free MP3 or WAV files from the web directly to your iOS "Files" app. Inside iMovie, tap the "+" button, scroll down to "Files," and select your downloaded track to import it.
Why won't iMovie let me add a song?
The most common reasons are that the song is DRM-protected (copyrighted via Apple Music) or the file format is incompatible. Ensure your audio file is locally downloaded to your device and formatted as an MP3 or WAV.
How to add music to iMovie iPhone from a screen recording?
If you have a screen recording with audio, import the recording into your iMovie timeline as a video clip. Tap the video clip, select the "Detach Audio" icon (or tap "Audio" and then "Detach"), and then delete the visual video track, leaving only the audio behind.