
The camera in your pocket is more than just a tool for saving quick memories—it is a powerful, professional-level creative studio. As cell phone pictures start looking more like magazine covers every day, knowing exactly how to edit photos on iPhone is a must-have skill.
This guide cuts through the confusion to give you real control over how your photos look. From small light tweaks to smarter editing habits, you will learn the exact steps needed to upgrade your camera roll and master the art of iPhone photo editing.
Understanding basic iPhone photo editing tools
Before you change a photo, you need to know the basic tools hiding in your Photos app. When it comes to photo editing in iPhone, Apple gives you surprising control over light and color. Before you look for a powerful AI image editor to make massive structural changes, you should get comfortable with these main sliders.
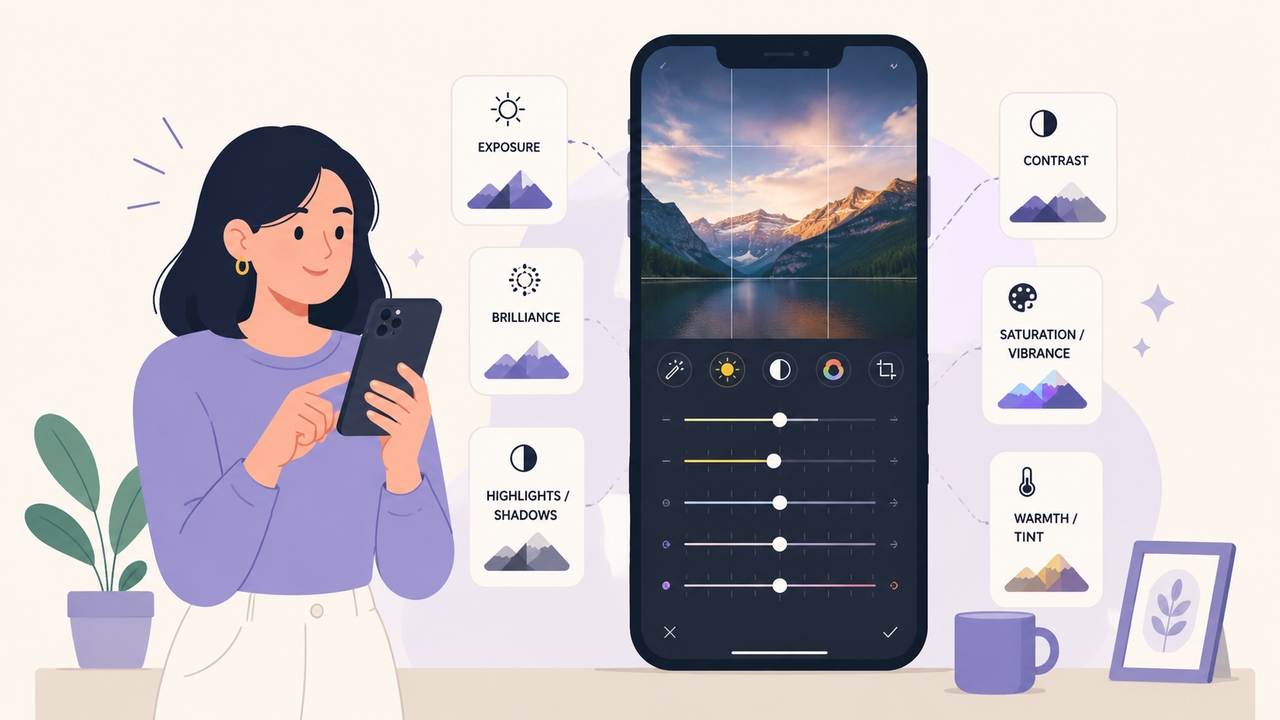
- Exposure: This is the baseline for your picture's brightness. Changing the exposure shifts the entire image, deciding how much light comes into the frame.
- Brilliance: A very smart tool. Brilliance targets specific areas to brighten shadows, calm down bright highlights, and add a little contrast that gives your photo an immediate pop.
- Highlights & Shadows: These sliders give you exact control. Highlights only change the brightest parts of your image—like a bright midday sky—helping you bring back lost cloud details. Shadows do the opposite, revealing textures hidden in the dark corners of your shot.
- Contrast: This slider controls the difference between light and dark. High contrast makes a dramatic look by deepening blacks and brightening whites, while lower contrast gives a softer feel.
- Saturation & Vibrance: Saturation pushes every color up at the same time, which can look fake. Vibrance is much smarter. It specifically boosts dull colors while protecting skin tones from turning neon orange.
- Warmth & Tint: Warmth changes the temperature of the color, pushing it toward a sunny yellow or a cool blue. Tint fixes the green and magenta balance, which is great for removing weird color casts from indoor lighting.
Step-by-step: How to edit a photo on iPhone
If you want to know how to edit a photo on iPhone without getting lost in all the options, the secret is having a set routine. Following a clear order is the best way to edit photos on iPhone quickly. By using these steps, you can figure out how to edit pictures on iPhone no matter where you are.
- Fix the Light First: Every great photograph relies on good lighting. Always start by moving your Exposure, Brilliance, and Contrast sliders. Getting the light right makes sure your colors look good later.
- Adjust the Color: Once the lighting looks natural, move on to Vibrance and Warmth. Doing proper color correction keeps the image looking real and prevents the fake, overly filtered look that ruins many photos.
- Bring Out the Details: Scroll over to Sharpness and Definition. A tiny boost here brings out textures, which is great for buildings and landscapes. For close-up portraits, using a dedicated AI photo retouch tool later on can smooth out skin textures and fix blemishes perfectly.
- Crop and Frame: The last step is fixing the geometry. Use the crop tool to straighten crooked horizons and cut out messy backgrounds at the edges. This keeps the viewer's eye right on your main subject. This routine makes learning how to edit iPhone photos, and especially how to edit pics on iPhone, incredibly simple.
The best iPhone photo edit settings for a professional look
The inquiry of "How do I edit a photo on my iPhone to emulate a professional aesthetic?" remains pervasive among mobile photographers. While every photograph possesses unique light physics, the modern editorial aesthetic—characterized by clean, luminous, and airy tones—relies upon a surprisingly consistent mathematical formula.
Try these exact iPhone photos edit settings on your next outdoor shot or portrait to strip away the dull digital look and give it the depth of a real camera:
- Exposure: +10
- Brilliance: +20
- Highlights: -15 (Brings back detail in bright skies)
- Shadows: +15 (Shows details hidden in the dark)
- Contrast: -10 (Softens the overall image)
- Brightness: +10
- Vibrance: +12
- Warmth: +8 (Adds a nice, sun-kissed glow)
- Sharpness: +15
Memorizing these best iPhone photo edit settings gives you a great starting point. From there, you can adjust the numbers to fit your specific picture, helping you figure out how to edit photos on iPhone to look professional every single time. Simply put, using the best edit settings for photos on iPhone changes average shots into great ones.
How to use iPhone editing filters effectively
Sometimes, you just need speed. In those moments, Apple's built-in iPhone edit filters act as great stylistic shortcuts. The current trend in mobile photography is moving away from heavily polished looks and leaning toward a classic, slightly nostalgic feel. When you want to figure out how to edit pictures on my iPhone quickly, these presets are your best friend.
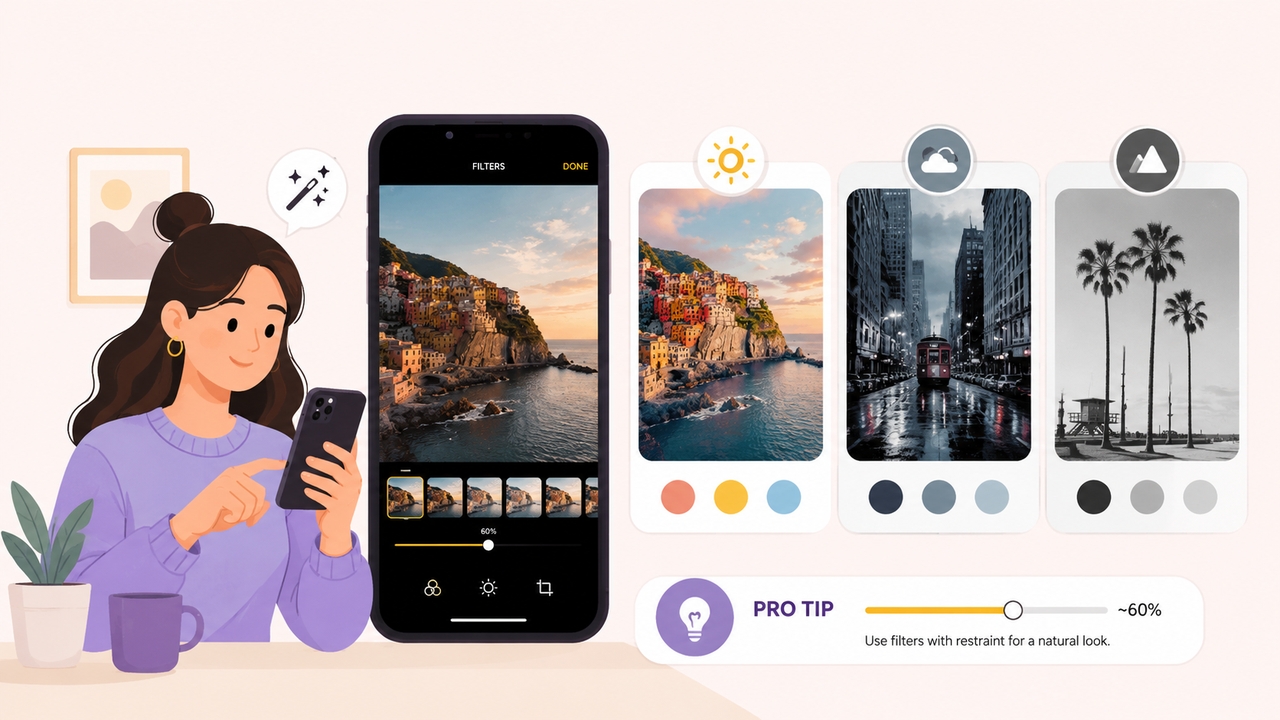
- The Vivid Collection: Filters like Vivid and Vivid Warm are made for dull lighting. They push the contrast and color hard, making them perfect for food photography or flat landscapes that need instant energy.
- The Dramatic Collection: Dramatic and Dramatic Cool darken the shadows and wash out the colors just a bit. This creates a moody feeling that looks amazing on street photography and city buildings.
- The Monochromatic Collection: Mono, Silvertone, and Noir instantly remove all color. Silvertone works beautifully as a soft vintage filter, giving you a film-like grain that feels like an old camera.
Pro Tip: The secret to using iPhone editing filters is restraint. Tap the filter a second time to reveal its slider. Pulling the effect back to about 60% ensures the filter helps your photo without completely taking it over.
How to copy and paste edits across multiple photos
Once you have successfully engineered a signature look, applying that identical aesthetic to a batch of photographs no longer requires tedious, repetitive labor. Apple's batch-editing capability represents a monumental paradigm shift for workflow efficiency.
To get the same look across all your pictures, open your finished image, tap the three dots in the top right corner, and select Copy Edits. Go back to your main camera roll grid, tap Select to pick all the photos you want to change, tap the three dots in the bottom corner, and choose Paste Edits. In a few seconds, your whole album will match perfectly.
Elevate your image editing with Framia Pro
While Apple's native tools are fantastic for basic light and color changes, you might hit a wall when you want to do more. Framia Pro takes your creativity to the next level. It is an all-in-one AI platform designed to close the gap between your ideas and a finished image. Instead of acting like a confusing, traditional workspace, it works as an intelligent photo enhancer that brings top-tier AI models into one simple chat window.

Why Framia Pro is the ultimate solution
Traditional desktop editing software often imposes a formidable learning curve, demanding hours of manual masking, brush precision, and complex layer management. Framia Pro dismantles these technical barriers by treating the system as a professional co-director. Underpinned by advanced generative reasoning, the platform deciphers artistic intent through natural language, executing complex manipulations with true studio-quality realism.
The platform's sophisticated feature suite introduces unprecedented capabilities to the mobile photography workflow:
- Chat-to-Edit: Instead of digging through menus, you just type what you want. Telling the AI to change the background weather or adjust the lighting instantly updates the image while keeping the original subject looking natural.
- Smart Inpainting and Outpainting: Removing annoying people in the background or expanding a tight photo is fully automatic. The system looks at the existing textures and light to build perfect background extensions that fit any social media size.
- Split Layers: Framia Pro turns flat pictures into separated layers. You can easily move, resize, or delete the background, text, or main subject without messing up the rest of the picture.
- Perfect Blending: When you need to swap subjects or faces for a creative project, the software matches the new elements perfectly. It reads the exact lighting angles and film grain of your original photo, so the final result never looks fake.
Wrapping up
Mastering how to edit iPhone photos is fundamentally an exercise in acute observation and calculated restraint. The device resting in your hands possesses a sophisticated suite capable of professional-grade color correction and profound light balancing. By understanding the underlying physics of light, utilizing stylistic presets strategically, and recognizing exactly when to bridge the gap into advanced, conversational digital platforms, you transform yourself from a passive consumer of fleeting moments into a deliberate creator of enduring visual art.
FAQs
How do I edit a photo on my iPhone without downloading apps?
Open the native Photos app, pick your photo, and tap "Edit" in the top right corner. This gives you a full menu of sliders for exposure, contrast, color, and filters without needing extra software.
What is the best way to edit photos on iPhone?
The best routine is a clear sequence: fix your lighting first (Exposure, Brilliance, Highlights), move on to color (Vibrance, Warmth), add detail with sharpness, and finish by cropping the image to frame your subject.
How to edit pictures on my iPhone to achieve a vintage aesthetic?
To accurately emulate a vintage film aesthetic, elevate the black point to slightly wash out the deepest shadows, introduce a degree of warmth, marginally decrease the overall saturation, and apply a desaturated preset—such as the Silvertone filter—at a reduced opacity.
How do I edit photos on my iPhone and apply those settings to an entire album?
After editing your first photo, tap the three dots in the top right and pick "Copy Edits." Then, select multiple photos from your grid, tap the three dots at the bottom, and choose "Paste Edits" to change them all at once.